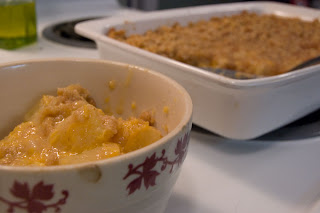
Showing posts with label cheese. Show all posts

Friday, December 10, 2010

Broccoli Cheddar Soup

I'm doing this post as a courtesy to my friend, Mary. By the way, Mary - the recipe was a "note" on facebook and not a blog post, which is why you didn't find it on here.  Also so for the lack of pictures, these were apparently all I posted on facebook.

So now I'll just repost here what I posted on facebook back on Nov. 04:

I was hunting the interwebz for recipes yesterday and trying to decide what to fix for dinner. It was cold and rainy and damn it, i wanted soup! Lo and behold, the Lord blessed me with this SUPER EASY recipe for Broccoli Cheddar Soup.


BROCCOLI CHEDDAR SOUP

INGREDIENTS:
¼ cup butter
1 onion, diced medium
3 cloves of fresh garlic, chopped
½ tsp fresh ground pepper
1 lb fresh broccoli florets
4 cups chicken bouillon
*12 oz. can of chicken broth*
½ cup all-purpose flour
1 ½ cups half & half
8 oz. shredded sharp cheddar


INSTRUCTIONS:
Melt the butter over medium heat.

Add onion; cook until softened.

Add garlic and pepper; cook 1 minute.

Stir in broccoli and chicken bouillon, bring to a boil, and then simmer 15 minutes until broccoli is tender.


Whisk flour into half &half in a separate bowl until dissolved (i first whisk all the flour into 1/2 cup half and half until a paste is formed, then add the rest of the half & half).

Add to soup, stirring until thickened.

*NOTE: Up until this point, I followed the recipe to the letter, but the soup thicken VERY quickly and soon became the consistency of porridge. So being the smart, crafty girl that I am, I added a can of chicken broth...slowly. I added about 1/3 of the can, stirred it very well and then added another third, stirred and so on.

Reduce heat to low, stir in cheese until melted.

Adjust seasonings as needed and serve with crusty french bread.


Enjoy!

Monday, November 15, 2010

Chicken Mushroom (and Spinach) Lasagna


I've been meaning to make this for awhile and I finally got around to it this weekend.

The recipe doesn't call for spinach, but I had some left over from a previous recipe and I didn't want it to go to waste, so I snapped the little stems off and added it to the mushrooms.

This recipe is one of the best things I've cooked in awhile, by FAR! I HIGHLY recommend this one!

INGREDIENTS:
1 10 oz. package of baby 'bellos or white mushrooms, thinly sliced
1/2 a bag of baby spinach (pinch off the stems)
4 garlic cloves, minced
1 tablespoon olive oil
5 tablespoons unsalted butter, divided
1/2 cup dry white wine
2 1/4 cups of roasted chicken*
2 1/2 cups of skim milk**
1 cup of half & half
1/4 cup all-purpose flour
2 teaspoons thyme leaves
3/4 cup grated Parmigiano-Reggiano
9 no-boil egg lasagna noodles***
1 1/2 cups coarsely grated Gruyère

*Regarding the roasted chicken, you could easily pick up a rotisserie chicken from the grocery store and use that - or you can do what I did and make your own 'quick' roasted chicken at home. (see recipe below)

**The original recipe calls for 3 1/2 cups of whole milk. I don't drink whole milk and so all I had was skim milk and some left over half & half for another precious recipe. So I split it up. Just use whatever milk you happen to have on hand. Yes, it may effect the richness of your sauce, but that really isn't a huge problem with this recipe. (The wine gives it such a good kick that you won't notice.)

***I didn't use the "no-boil" noodles because I already had a new package of whole wheat lasagna noodles. Also I recently bought a Pasta Boat and it makes cooking pasta SO easy. And I cooked the noodles slightly less than al dente, since they're going in the oven anyway.

INSTRUCTIONS:

Roasted Chicken Breasts

Preheat oven to 400° with rack in middle.

Brush the chicken with EVOO on both sides Sprinkle with kosher salt and pepper. Place them on a baking sheet and bake for 30 minutes.


Chicken Mushroom (and Spinach) Lasagna

Preheat oven to 425° with rack in middle.

Cook mushrooms, spinach, garlic, 1/4 teaspoon salt, and 1/8 teaspoon pepper in olive oil and add 1 tablespoon butter in a saucepan over medium heat, stirring occasionally, until mushrooms are softened, about 5 minutes.


Add wine and simmer briskly 2 minutes.


Transfer mushroom mixture to a large bowl and stir in chicken.


Bring milk to barely a simmer in a medium saucepan.

In a different pan, Melt remaining 4 tablespoons butter medium-low heat. Add flour and cook roux, whisking constantly, 3 minutes.


Add hot milk in a slow stream, whisking constantly. Add thyme, 3/4 teaspoon salt, and 1/2 teaspoon pepper and simmer, whisking occasionally, until thickened, 5 to 6 minutes. Remove from heat and reserve 1 cup sauce. Stir Parmesan into sauce remaining in pan, then stir into mushroom filling.


Pour half of reserved plain sauce into baking pan, spreading evenly to coat bottom.


Add 3 lasagna noodles, overlapping slightly, and one third of mushroom filling, spreading evenly, then sprinkle one fourth of Gruyère over top. Repeat 2 times.


Top with remaining 3 lasagna noodles and remaining plain sauce, spreading evenly. Sprinkle with remaining Gruyère.


Cover with foil, tenting slightly to prevent foil from touching top of lasagna but sealing all around edge, and bake 30 minutes. Remove foil and bake until cheese is golden, about 15 minutes more.

Fresh out of the oven!

Let lasagna stand at least 10 minutes before serving.

Again, I can't stress just HOW good this non-traditional lasagna is! Don't be put off by the roux - it only takes a few minutes.

Enjoy!

___________________________________________________

Chicken Mushroom (and Spinach) Lasagna

INGREDIENTS:
1 10 oz. package of baby 'bellos or white mushrooms, thinly sliced
1/2 a bag of baby spinach (pinch off the stems) *optional
4 garlic cloves, minced
1 tablespoon olive oil
5 tablespoons unsalted butter, divided
1/2 cup dry white wine
2 1/4 cups of roasted chicken
2 1/2 cups of skim milk
1 cup of half & half
1/4 cup all-purpose flour
2 teaspoons thyme leaves
3/4 cup grated Parmigiano-Reggiano
9 no-boil egg lasagna noodles
1 1/2 cups coarsely grated Gruyère


Preheat oven to 425° with rack in middle.

Cook mushrooms, spinach, garlic, 1/4 teaspoon salt, and 1/8 teaspoon pepper in olive oil and add 1 tablespoon butter in a saucepan over medium heat, stirring occasionally, until mushrooms are softened, about 5 minutes.

Add wine and simmer briskly 2 minutes.

Transfer mushroom mixture to a large bowl and stir in chicken.

Bring milk to barely a simmer in a medium saucepan.

In a different pan, Melt remaining 4 tablespoons butter medium-low heat. Add flour and cook roux, whisking constantly, 3 minutes.

Add hot milk in a slow stream, whisking constantly. Add thyme, 3/4 teaspoon salt, and 1/2 teaspoon pepper and simmer, whisking occasionally, until thickened, 5 to 6 minutes. Remove from heat and reserve 1 cup sauce. Stir Parmesan into sauce remaining in pan, then stir into mushroom filling.

Pour half of reserved plain sauce into baking pan, spreading evenly to coat bottom.

Add 3 lasagna noodles, overlapping slightly, and one third of mushroom filling, spreading evenly, then sprinkle one fourth of Gruyère over top. Repeat 2 times.

Top with remaining 3 lasagna noodles and remaining plain sauce, spreading evenly. Sprinkle with remaining Gruyère.

Cover with foil, tenting slightly to prevent foil from touching top of lasagna but sealing all around edge, and bake 30 minutes. Remove foil and bake until cheese is golden, about 15 minutes more.

Let lasagna stand at least 10 minutes before serving.

Saturday, February 20, 2010

Oven-Fried Chimichangas

Today's recipe is a tried and true favorite of mine. It's so simple and versatile that a lot of times I don't even have to go to the store for anything.

I found this recipe on fromthegalley.blogspot.com awhile ago and I've made several changes, but that's the great thing about the recipe. It allows for creativity. :)

First things first: cook the chicken. Now you can cook the chicken breasts any way you see fit, but I thawed them in the microwave and cooked them in a pan with some fajita seasoning to make them more "mexican". If you want to just continue cooking them in the microwave, go right ahead or boil it. Just cook it somehow! lol


It should look something along the lines of this, when its done:


After the chicken is done, set it aside to cool long enough to be able to handle. To shred the chicken, I'll put one breast at a time in a medium sized bowl and pull it apart with two forks. Again, this is a thankless process but looks SO much better than chopped chicken.

Go ahead and preheat the oven to 400°F.

In a large bowl, mix together 1/2 of the salsa, cumin, oregano, chicken, green chilies, and 1 cup of the cheese. (This is when you can add ANYTHING you like to the mix. I've used black beans before, onions, roasted red peppers, etc...)


I ended up making 5 chimichangas out of this batch, but it depends on how much filling you put in each one. Just use your judgment on filling the tortillas.


This next part can be a little tricky/frustrating, but just do the best you can when folding them up. I fold the ends in first and then roll them up.

They should look something like this:


Go ahead and dump the rest of the salsa all over the chimichangas and top off with the rest of the cheese.


Pop the little dudes into the oven for 20 - 25 minutes.

.....DING!

YAY! They're done!! :) Yummers!

I normally serve them with reduced-fat sour cream because I love sour cream!

Well, that's about it. I told you this recipe was super easy! Enjoy!!

______________________________________________________
Oven Fried Chimichangas

Ingredients:
1 24oz. jar of salsa, divided
1 tsp ground cumin
1/2 tsp dried crushed oregano
1 small can of diced green chilies
2 cooked chicken breasts, shredded
2 cups shredded cheese
5 burrito size tortillas

Condiments of choice (sour cream, extra salsa, green onions, red peppers)

Instructions:
Preheat oven to 400°

Mix together 1/2 of the salsa, cumin, oregano, chicken, diced green chilies and 1 cup of the cheese.

Place a medium amount of the mixture in the center of each tortilla.

Fold opposite sides of the tortilla over filling and then roll from the bottom up and place seam-side down on a lightly greased baking dish.

Pour the remaining salsa over the top and sprinkle with the remaining cup of cheese.

Bake for about 20-25 minutes (cheese should be melted).

Serve with condiments of your choice.

Saturday, February 13, 2010

Pineapple Cheese Casserole


I know what you're thinking..."Pineapple Cheese Casserole? Ew." Well, stop that right now because once you've tasted it, you'll never question me again! NEVER! :)

The first time I ever had this dish was when I was in Montgomery, AL with my mom. We were cleaning out my grandmother's house and decided to order dinner from Martin's Restaurant. That place has THE best fried chicken among other things. Anyway, so at Mom's suggestion, I tried their pineapple cheese casserole and well... obviously I liked it seeing as I'm making it here. :)

Now this isn't their recipe, per se...but they are all pretty much the same. So onto the food!

This is a super simple recipe and it takes no time at all. So this would be great for a week night dish and if your picky eaters like cheese and pineapple - you've got a crowd pleaser on your hands!

Preheat the oven to 350° F and spray a medium-size casserole dish with cooking spray. Now I veered off the recipe here - actually, I just didn't read it very well and used a 9x12 dish. If this is what you end up using, be aware that you will have to make 1 1/2 times the topping recipe.

In a large bowl, stir together the sugar and flour.


Next stir in 2 cups of shredded sharp cheddar cheese.
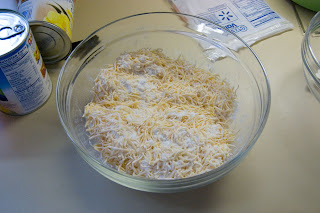

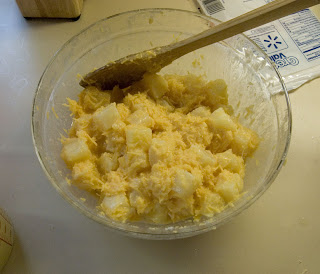
Add the drained pineapple chunks. Make sure to get your spoon up under the pineapple chunks after adding to the dry ingredients, the flour and such likes to hide underneath. Mix until well combined.

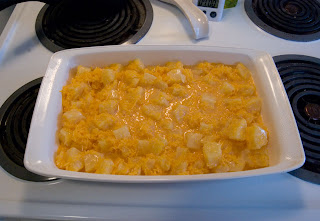
Pour the mixture into the prepared casserole dish. *Remember - I would recommend using a smaller dish than this 9x12 one.

In another bowl, combine one sleeve of Ritz™ crackers* (smashed into crumbs), melted butter, and reserved pineapple juice. Mix until well combined!

*While at the grocery store, buying some things I needed for the recipe, I noticed that Ritz™ now makes whole wheat crackers. I figured why not try to make this a LITTLE bit better for me or at least have more nutritionally-redeeming qualities so that's what I used. And by the way, they are good!

Go ahead and spread the crumb mixture on top of pineapple mixture.
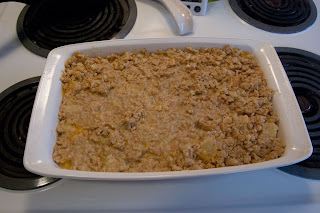


Now, pop it in the oven and bake for 35 minutes, or until golden brown. (There will not be much difference in color between the casserole before you put it in the oven and when you take it out.)
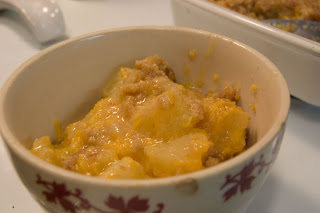

This makes a good side dish, but I also eat it by itself as a snack or even dessert.

Enjoy! Next post: I'm thinking about Chipotle Bean Burritos.

_______________________________________________
Pineapple Cheese Casserole

Ingredients:
1 cup sugar
6 tablespoons all-purpose flour
2 cups grated sharp cheddar
2 20 oz. cans pineapple chunks, drained, and 6 tablespoons pineapple juice reserved
1 cup cracker crumbs (recommended: Ritz™ Whole Wheat Crackers)
8 tablespoons butter, melted

Instructions:
Preheat the oven to 350° F.

Prep a medium-size casserole dish with cooking spray.

In a large bowl, stir together the sugar and flour. Next, stir in the cheese.

Add the drained pineapple chunks, and stir until ingredients are well combined.

Pour the mixture into the prepared casserole dish.

In another bowl, combine cracker crumbs, melted butter, and reserved pineapple juice, mix until evenly blended.

Spread crumb mixture on top of pineapple mixture.

Bake for 35 minutes, or until golden brown.

Thursday, January 14, 2010

Mexican Casserole


A long time ago, I found a recipe for a Mexican casserole that I never got around to cooking. Well, I pulled it out of my binder the other day and decided it was time to make it since it seemed simple enough. Therein lied the problem. It was too simple and I thought it could use some JAZZING up!

So here is my take on the Mexican casserole. Keep in mind, you can make this recipe your own VERY easily by adding black beans (which I may do next time) or anything else you think might fit the taste buds of your particular crowd.

Firstly, preheat the oven to 400°F and then combine the Bisquick, eggs, milk and salt & pepper.


Next, I browned the ground beef along with the chopped onion.

Once that is done, drain the whole thing. I usually put my colander on a stack of paper towels on top of a plate. That way i can throw the lot out afterward and not worry about all that grease going down my drain.

I put the meat/onion mixture back into the pan and added the corn, Rotel, jalapeños, green chilies and taco seasoning. (If you don't want it to be as spicy, add half or 3/4 of the seasoning instead of the whole packet.) Give the whole mess a good stir to mix everything up well.


It doesn't matter what type of baking dish you use, just so long as it will all fit. And
*remember* the Bisquick WILL RISE - so a deeper dish would probably be best. So let's put everything into that dish now!


The original recipe called to add the green chilies in a ring around the edge of the mixture, which I did. But after eating it, it was kind of weird and gross to get a big, ole' forkful of slimy green chilies - so this is when i decided mixing them up with the rest of the veggies would be a good idea. Granted, it does look cool... but no one will know because you'll have covered it with awesome cheesy, Bisquicky goodness.

Just ignore the green ring around the cheese in the following picture. This is the step where you would cover the whole meat concoction with half of the cheese.


Now cover the whole thing up with the Bisquick.


Then the rest of the cheese!

Pop that bad boy into the oven for 30 minutes!


And after 30 minutes, you should be pulling the following loveliness out of your oven.


I couldn't wait to try it so I grabbed a big, metal spoon and scooped myself out dinner.

I don't see why you couldn't maybe add a dollop of sour cream along side it or anything you think might add to its enjoyment.

So there it is - super simple, yet so yummy!!

_______________________________________________

Mexican Casserole Recipe

Ingredients:
1 ½ pounds, ground beef
1/2 onion, chopped
1 can green chilies, drained
1 can corn, drained
1 can Rotel, drained
2 Tbsp sliced jalapeños (optional)
1 package taco seasoning
1/2 teaspoon salt
1/2 teaspoon pepper
2 cups Bisquick
3 eggs
1 cup milk
1 ¾ cups Mexican blend cheese, shredded (divided)

Instructions:
Preheat oven to at 400°F

Combine Bisquick, eggs, milk, salt and pepper.

In a large pan, brown the ground beef with the onion. Drain and put mixture back into pan.

Add the corn, jalapeños, green chilies, Rotel, and taco seasoning (If you don’t want it to be very spicy, add half to three quarters of the package).

Mix well and put into baking dish.

Spread half of the cheese over the top.

Pour Bisquick over the cheese and finish off with the rest of the cheese.

Bake for 30 minutes.

Friday, January 8, 2010

Chubble Bread


I've made this recipe several times before, but never for the food blog-loving public. So here goes!

I didn't take a whole lot of photos b/c i didn't anticipate turning them into a blog post. Oh well...

Now in the recipe it says to you a stand-up mixer, but I don't have one. So I do it all BY HAND! And let me tell you that making bread isn't for the weak. I couldn't help but think about the pioneer women doing this every morning for breakfast...ugh. Keep in mind that there is NOTHING WRONG with doing it by hand, it's just a whole lot of work.
________________________________

Chubble Bread
This recipe came originally from To Be Mrs. Marv..., but I have modified it in a few places.

Sponge:
1 tsp active dry yeast
1/2 cup warm water
3/4 cup unbleached all-purpose flour

Dough:
1 tsp active dry yeast
1 cup warm water
3 tsp olive oil
Sponge, above
3 1/4 cup unbleached all purpose flour
a pinch of kosher salt

Stuffs:
10 oz. shredded sharp cheddar cheese
1/4 cup Parmesan cheese from a can
1 bunch green onions, thinly sliced
1 bunch parsley, chopped
2 tsp garlic power
1 1/2 tsp dried oregano
1 1/4 t red pepper flakes
3 Tbsp olive oil

Sponge:
Sprinkle yeast over the warm water in a large bowl, whisk it in, and let stand until creamy, about 10 minutes. Stir in the flour. Cover with plastic wrap and let rise until doubled in size, about 45 minutes.

Dough:
Sprinkle yeast over the warm water in a small bowl, whisk it in, and let stand until creamy, about 5 to 10 minutes. Using a heavy-duty mixer, add the dissolved yeast and the olive oil to the sponge in the mixer bowl; mix in with the paddle attachment until well blended. Add in salt. Add in flour 1/4 c at a time - when you get to 3 cups, the dough should stop being very sticky and become only slightly sticky.

Change to the dough hook and knead at medium speed until the dough is soft, velvety and slightly sticky, 3 to 4 minutes. At this point you will be able to pull the dough up into peaks with your fingers. Finish by sprinkling flour on the counter and kneading the dough briefly. Transfer to a bowl lightly coated with olive oil and cover with plastic wrap and let rise until doubled about 90 mins.

Stuffs:
Feel free to prep and toss together all stuffs ingredients in a large bowl. Coat the mixture with oil. Cover with a towel and set aside.

Stuffs & Second Rise:
Empty out bread on a non-sick surface. Shape into a flat rectangle, approximately 1/2″ - 1″ thick. Using a pizza wheel, cut loaf into inch wide strips. They do not need to be uniform. Then cut off one inch ends.

Put about half of the stuffs in a wide bowl and then begin adding the dough squares/balls into the bowl. Toss dough in the stuffs and gently coat them. Add in more stuffs periodically so that they stay separate.

Divide mixture into your baking pans. I have been using 2 round cake pans (it gives them that Sister Schubert's look) Once you have dough in pans, cover with plastic wrap and leave for second rise in a warm area. Let rise until doubled, about 1 hour.

Baking:
Preheat oven to 400°f. Brush top with olive oil and bake for 25-30 minutes, until golden brown.


DO NOT OVERCOOK THESE! They tend to dry out easily!!

Monday, July 14, 2008

Ricotta-Stuffed Bacon-Wrapped Dates

Recipe courtesy Dave Lieberman


Ingredients:

1 pound (about 12 to 13 slices) bacon
25 Medjool dates (about 3/4 pound)
1/3 cup ricotta cheese

Special Equipment: toothpicks, a bamboo skewer for removing pits


Instructions:
Preheat oven to 450 degrees F.

Cut the bacon in half lengthwise to make twice as many slices. Set aside.

To remove the pits from the dates, cut the tips off each end of the dates and insert the flat end of the skewer until it pushes the pit out of the date. Repeat with remaining dates. [i didn't use a skewer. I used a metal chopstick. Anything narrow and pointy will work]

Place the ricotta in the bottom corner of a strong plastic bag and seal tightly. Use scissors to cut a small hole in the tip of 1 of the corners. Now use the bag like a piping bag to fill the dates with the cheese. [i felt SO professional doing this lol]

Wrap the ricotta stuffed dates with a slice of bacon and secure with a toothpick through the belly of the date.

Arrange all the prepared dates on an aluminum foil covered baking sheet, allowing at least a little space between each one for good browning. [I used the foil for easy clean up]

Roast for 15 to 20 minutes or until bacon is browned and crispy. Remove from the baking sheet and gently remove toothpicks.

Serve immediately!

COMMENTS:
These were very good as well, but you really could only eat a few at a sitting. I actually ate a couple yesterday and i think they're better the NEXT day b/c the sweetness of the dates is mellowed slightly by being wrapped in all that bacony-goodness for 24 hours. lol